TrueAppend was created to save you time and money by reducing overhead and the costs associated with doing a data append. Watch the video below for a step by step guide to processing your first file.
Check out our video here: Getting Started Video
Registration
Registration is accessible two different ways.
1) Navigate to TrueAppend.com and click the Get Started button. This button redirects the user to the registration page.
2) Navigate to http://app.trueappend.com/Users/Register.
*** We encourage all users to explore our FAQs, which have a plethora of information on the data append process and getting started with TrueAppend.
New users must fill out a short Registration Form to access TrueAppend. This form requires users to enter their First and Last Name, Email Address, a user-created Password, Organization Name, and Organization Website. These fields are used to create your account, and verify that you represent a verified organization.

Log In
Once registered, users have full access to app.TrueAppend.com, and can use their email address (username) and password to sign in again.

Processing a File
Process times vary depending on file size and the number of attributes selected. The average file completes the append process within 24 hours of successfully submitting your file.
TrueAppend is 100% automated, and we'll email you when your file is done!
Requirements
To start the process, users must include certain fields and have the correct file type. To upload a file, TrueAppend requires the following fields:
First Name
Last Name
Address 1
City, State or Postal Code
Input ID
We encourage users to include as much address related information on their upload file as possible, including: Address ID, Address 2, and Postal Code.
Before a user can upload a file, they should ensure that their file is either a Comma-Separated Values (CSV) file, a Tab Delimited file, or an Excel file in the XLS or XLXS format.
A Comma-Separated Value (CSV) File is a simple file format used to store tabular data, such as a spreadsheet or database. A CSV file, as its name states, is created by adding commas to separate the data (review a sample here). CSV files can be created in Excel by saving the table and changing the 'Save as Type' to CSV (Comma Delimited).
A Tab Delimited File is, also, a simple text format for storing data in a tabular structure, such as a spreadsheet or database (review a sample here). This type of file is created by adding tabs between data fields. Tab Delimited files can be created in Excel by saving the table and changing the 'Save as Type' to Text (tab delimited)
Upload
Users can upload a file right from our homepage. On the homepage, users will see an Upload Data section. This section allows users to upload their file three different ways: Paste, Drag/Drop, and Browse
- To Paste: User should 1) open their file; 2) copy all rows including the header; 3) and paste into the Upload Box. User should paste near the Copy/Paste icon. In the picture below, you'll see the text cursor on the Paste icon.
- Drag/Drop: User should access their file and drag into the Upload Box. User should drag the Drag icon in the Upload box to have successful file upload.
- Browse Files: User should click the Browse Icon. Their File Explorer should open and allow the user to select the file they want to upload.
Please note: All files should be selected from their original file source. A file selected from Recent Files of Frequent Folders will not upload.
When a file has uploaded successfully the Upload Box will have a green border and the Continue Button will turn green. See below:
![]()
To continue processing your successfully uploaded file, click the green Continue Button.
If there is an issue with upload, please contact support@trueappend.com for help.
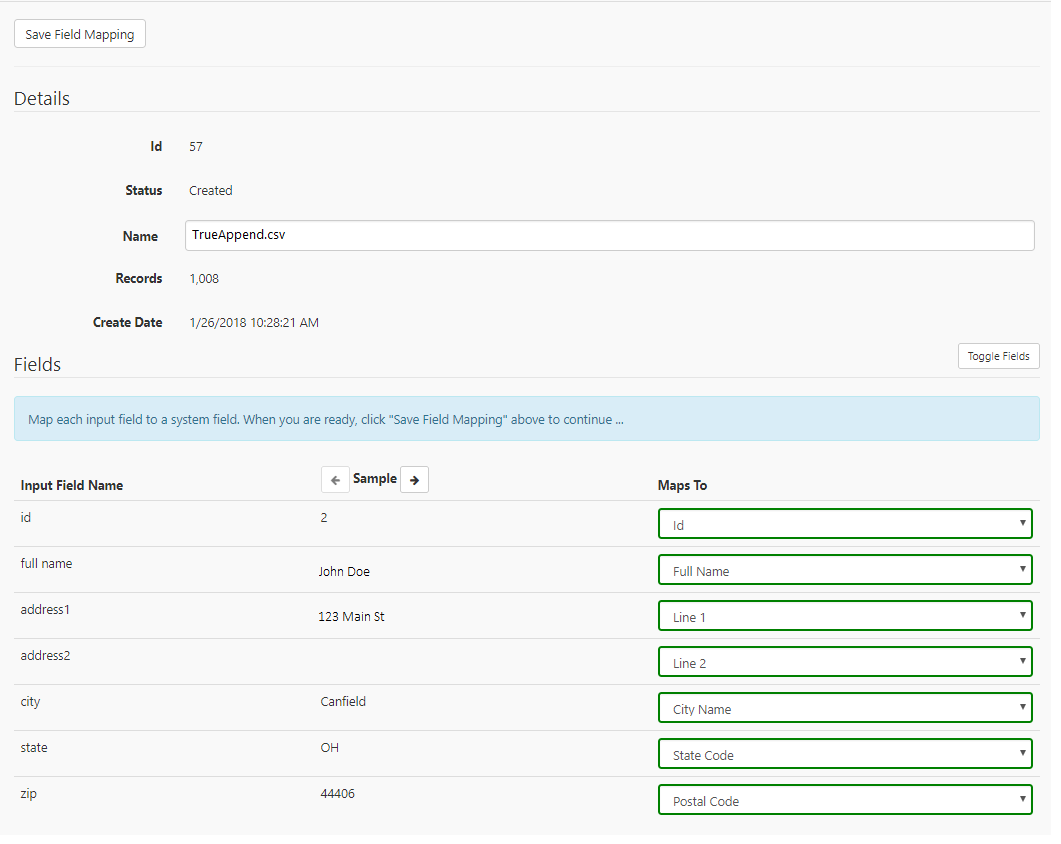
Map Fields
To process your file correctly, TrueAppend requires users to map their input fields to our system fields. This allows us to read your file correctly and process it.
TrueAppend has an auto-map feature. Once you upload your file, if the system recognizes some of your field names, it will automatically be mapped. Users should review mapped fields to confirm their mapping selections. Users can simply click the drop down, and select the system field that matches their input field. This is helpful when all or some of your fields are not automatically mapped.
The following system fields must have an input field mapped to it:
First Name
Last Name
Address 1
City, State or Postal Code
Input ID
Save Field Mapping
Once these fields are successfully mapped, users should select the Save Field Mapping button located at the top of the page. Users will then be able to review the fields they have mapped once more. If needed, users can click Edit, and update the File Name. Or if there was a mistake with the file, they can delete the file.
Process Your File
Now, the user can process their file through TrueAppend! Click Process located at the top of the page. The data append is now being standardized and appended. The status of your file is listed on the File Display page and will have a rotating icon until the file is complete.
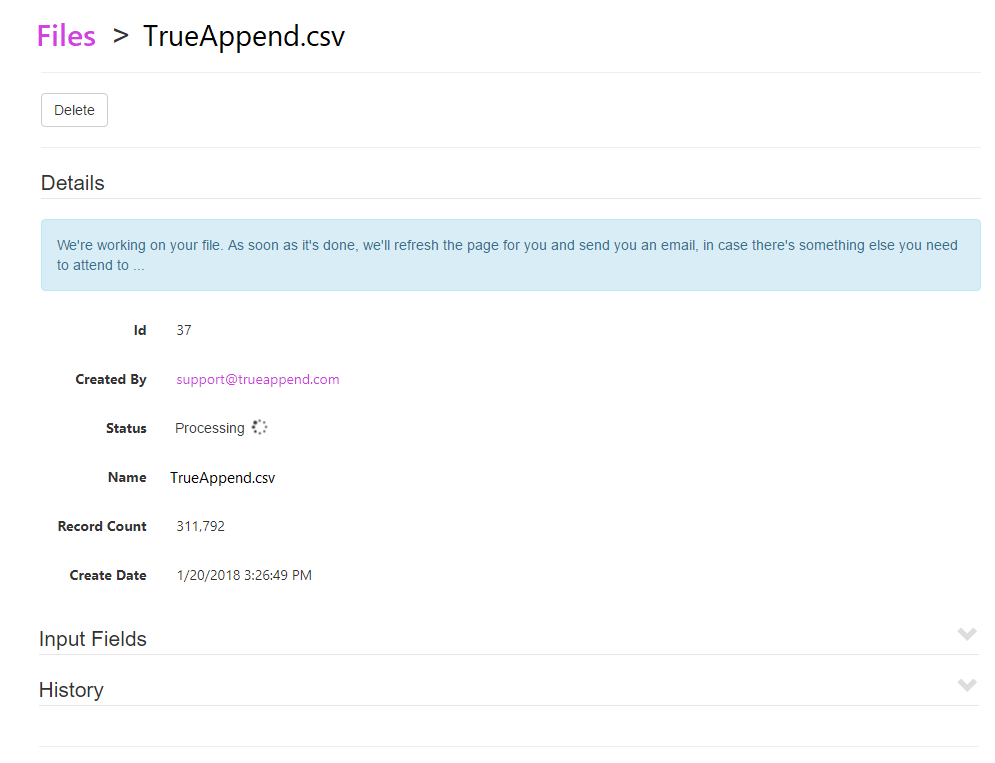
Users can navigate away from this page during processing. Once complete, an email will be sent notifying users that their file is done. Then, they can click the link in the email to or go directly into the app to access their file. If the page is still open, the user should see a prompt notifying them that their file is complete.
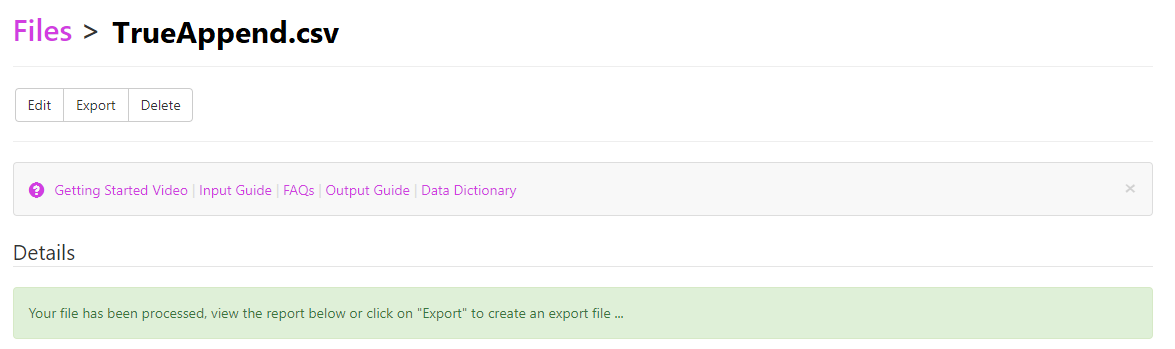
TrueAppend Report
When your file finishes processing, we generate your complimentary TrueAppend Report (check out a sample here). We encourage you to review your TrueAppend Report, which tells you some high level details like number of records processed, the match rates for each attribute, and attribute analysis.
Attribute Anaylsis
If you scroll further down your File Display page, you’ll notice the attribute analysis section of the TrueAppend Report. Each attribute is accompanied by a set of graphs that plot the distribution of records that matched to the attribute values. If you refer to the example below, you'll see the distribution of values for the Income Decile attribute. We also report the % of Missing Values, which corresponds to the number of null values returned for that attribute (this is a cost saving measure for your benefit).
Attribute analysis charts demonstrate match rates and distribution. Here, we see distribution for the Income Decile attribute.
Export and Download
To download a file for the first time, users must have an account balance greater than or equal to the number of credits required to download your file. (See the Credits section below for more details). Each initial download costs 1 credit per attribute per 10 records matched. The credits needed to download your custom attribute package will vary depending on the size of your file, the attributes you have selected, and the match rate for each attribute.
When ready to download, users can click the 'Export' button located at the top of the screen. After clicking the Export button, users will be taken to the export page. Here, you'll select the custom attributes you would like to download.
Afterwards, click the Download button. Users will be asked to confirm that they want to download the file. After confirming the Download request, users will be notified of how many credits they will use. Another prompt will ask users to confirm that they understand that downloading the file will deduct credits from their account balance.
The file will now download to the browser as a CSV file. We recommend users save the downloaded file directly to their computer.
Users can re-download a file (or any previously purchased attributes) at any time for FREE. Here at TrueAppend, we believe that once you pay for something it is yours.
Credits
TrueAppend uses a credit system to purchase downloads. In this system, users can download using 1 credit per attribute per 10 records matched.
Purchasing credits is quick and easy. Users can add credits whenever they want and will only be prompted to purchase a credit after they attempt to download a file that they don't have enough credits to download.
TrueAppend gives users the option to buy 1,000 credits for $100, 10,000 credits for $1,000, or 50,000 credits for $5,000.
To purchase credits, click the credit counter button:
![]()
This button will open a payment form. This payment form is powered by Stripe. Stripe uses best-in-class security tools and practices to maintain a high level of security and is a PCI Service Provider Level 1. These credits do not expire. Once purchased, users will receive a receipt via email and can use their credits immediately.
Give us a try...
Upload, Paste, or Drag & Drop your data file today for our all-inclusive append services and receive your complimentary TrueAppend Report - no credit card required.
20 thoughts on “Getting Started”
Comments are closed.